ASSEMBLING ACTIVITIES
ASSEMBLY OF COMPONENT INSIDE GENERATOR SECTION
- Assembled the lower bracket.
- Attached the lower guide bearing oil cooler.
- Cleaned the stator windings.
- Overhauled the rotor between the stator windings by maintaining uniform air gaps.
- Attached the stator-rotor protective cover.
- Assembled the Upper Bracket using EOT crane
- Grinded the bolt and taper wedges of upper bracket to remove the welded tag from the parts.
- Placed and tagged the bolts and taper wedge at the upper bracket.
- Placed the taper wedge at lower bracket.
- Used the pre-installed jacking machine to align the shafts of runner and rotor.
- Used rotor lifting device to align the center of rotor.
- Assembled oil cooler of upper guide bearing.
- Heated the thrust collar up to 65°C to expand the collar for easier fitting with generator shaft.
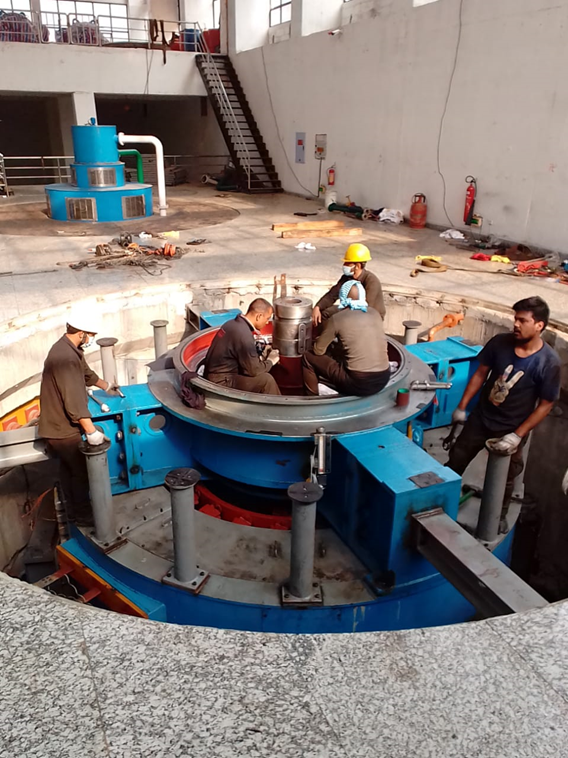
- Assembled thrust collar to the generator shaft.
- Attached all thrust pad sensors.
- Attached the oil and cooling water inlet/outlet pipeline of upper bearing assembly.
- Assembled upper guide bearing pedestal ring.
- Tightened the bolt of upper guide bearing pedestal using impact gun.
- Added cover of lower guide bearing
- Placed the cooler of lower guide bearing.
- Attached the bearing pad of lower guide bearing.
- Attached the oil and cooling water inlet/outlet pipeline of the lower guide bearing assembly.
- Assembled the lower guide bearing seal cover.
- Measured the clearance of lower guide bearing pad with shaft by feeler gauge.
- Tightened the coupling bots of coupling preset between runner shaft and generator shaft.
- Measured the pressure and elongation of the coupling bolt by the use of the dial gauge and pressure gauge on hydraulic bolt tensioner.
- Attached the base of oil tank of lower guide bearing.
Reference Image
Image 1: Assembly of Upper Guide Bearing